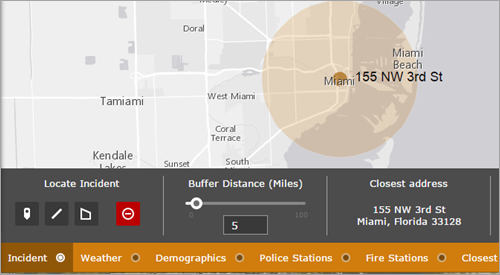
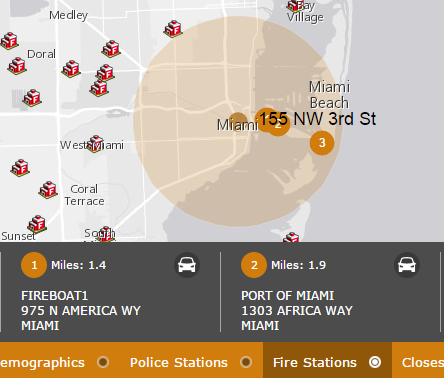
The Incident Analysis widget allows you to locate an incident on the map and analyze information from different feature layers within a specified distance of the incident. It supports feature layers from feature services and map services.
Caution:
The Incident Analysis widget does not support IE8 and has limitation in IE9.
Configuring the Incident Analysis widget
This widget can be set to open automatically when
an app starts. To enable this feature, click the Open this widget automatically when
the app starts button  on the widget, which turns it dark
green.
- Hover over the widget and click the Configure this widget button
 to open the configuration properties dialog box.
 - Set the title for the widget and, optionally click the Change widget icon if you want to replace the default icon for this widget.
A file explorer window allows you to browse to a local image file to use it as the widget icon.
- Specify the tab label for Incident and area of interested for Locate Incident.
- Click Add Tab to add a tab that will display information from a specific layer related to the incident. Each tab will allow you to specify a layer from the list of feature layers in the map. You can also specify the type of analysis using one of the following options:

- Summary—A summary for each of the visible, numeric fields in the layer.
- Proximity—A list of features from the layer that are within the specified distance of the incident.
- Closest Feature—The closest feature to the incident.
- Optionally, a label can be specified for each tab.
- Click the Edit tool under the Actions to open the Select Fields window, adding fields for analysis.
- Optionally, change the order of tabs or to delete a tab under Actions.
- In the General Settings section of the configuration window, you can specify the following options:
- Distance Units—Select the units to be used for the Proximity and Closest Feature analysis.
- Enable Routing—Check this option to enable routing from the feature to the incident. The Directions widget is also required to be part of the application for this option.
- Closest Feature Maximum Distance—The maximum distance to use when searching for the closest feature.
- Buffer Label—Optional label for the Buffer Distance.
- Minimum Buffer Distance—Minimum distance allowed to buffer incidents.
Caution:
As the value set for the buffer is always a range, the widget defaults to the minimum buffer distance plus 10 on start.
- Maximum Buffer Distance—Maximum distance allowed to buffer incidents.
- In Weather Options, check the Include Weather Information option if you want to display current and forecasted weather conditions at the incident location. Check Celsius-Kilometers to display wind speed in such unit. You can also use the Select Weather Layers button to select any weather related layers—such as radar or precipitation—from the currently selected web map that need to be displayed on the map when the weather tab is selected. Most importantly if you want the layers used in the widget to stay on when you activate the widget, check Disable layer visibility management.
Using the Incident Analysis widget
- Click the Incident Analysis widget icon to open it. The widget displays at the bottom of the map.
- The Incident tab is selected by default.

- To specify a buffer distance to the incident, drag the slider or manually input a value and press the enter key.
Note:
When you manually input a distance value , the buffer slider will not dynamically changed until you press the enter key to submit the actual buffer value.
- Locate an incident on the map by using one of the Locate Incident drawing tools. Click the Clear Incident icon
 to clear the incident.
 - Click other tabs—such as Weather, Demographics, and Fire Stations—that are configured in the widget to view the analyzed information for specified layers. You can scroll the widget panel horizontally to view additional results.

- Optionally, click a car icon to get directions from selected features (for example, a police station) to the incident.

The car icon appears only if the Enable Routing option is selected and the Directions widget is configured in the app.
- Optionally click the number icon to zoom to the feature.
- Optionally click Download CSV to download analyzed data as a CSV file.
- To close the widget, click the Close button at the lower right corner of the widget.